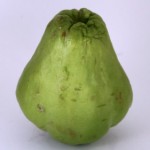
I discovered Japanese pumpkin (aka kabocha squash) at an organic farm in Apple Hill this past fall. They average about 2-3 pounds and have green, knobby skin (the ones I’ve seen in stores are darker green than the one at left, which lived on my kitchen counter for about 4 months). According to Wikipedia, they are rich in beta carotene, with iron, vitamin C, potassium, smaller traces of calcium, folic acid, and minute amounts of B vitamins.
The farmer had both the traditional Japanese version, which is green, and an orange hybrid he had bred for Americans, who are more accustomed to seeing orange pumpkins. I got one of each (the orange ended up in this amazing pie recipe) and saved the green one to use for a Kitchen Adventure. They are often tempura fried or simmered, but as they are sweeter and dried than other squash, they make an excellent ingredient for baking. I have been wanting to make homemade challah bread for months, ever since talking to my coworkers who make it every week, and here was an opportunity to put my own spin on the bread. Plus, isn’t it fun to say you made Japanese challah?
Japanese Pumpkin Challah Bread
Yields: 2 loaves
Prep time: 3 hours, 15 minutes to 3 hours, 45 minutes
(Note: leave yourself lots of time! Do not make this late at night or right before dinner.)
Bake time: 45 minutes for the pumpkin, 20 minutes for the bread
- 1 Japanese pumpkin
- 1 package (7g) yeast
- 2/3 C warm water
- 2/3 C unbleached white flour
- 1/3 C sugar
- 3/4 C Japanese pumpkin puree (you could substitute regular pumpkin if necessary, but then you’re not trying something new)
- 1/4 C canola oil
- 1 egg (+ 1 egg yolk for glaze)
- 1 t salt
- 1/2 t ground cinnamon
- 1/2 t ground cardamom
- 3 1/3 C unbleached white flour
- Oil to grease bowl
- Cornmeal or parchment paper
Pre-heat oven to 375°. Cut the pumpkin in half and place both pieces in a casserole dish with around 1/2 inch of water in the bottom. Bake for around 45 minutes or until fork tender. Once the pumpkin cools, scoop the meat out and puree in a food processor or blender (this step will make it much easier to incorporate into the dough). This step can be done in advance and the puree can be kept in the fridge for 3-4 days or the freezer for up to 3 months.
Mix the yeast with 2/3 cup of flour and the warm water. Leave in a warm spot (such as a turned off oven) to proof for 10-15 minutes. The mixture will get a little foamy (see picture on right).
Put the dough hook attachment in your electric mixer. Pour the yeast mixture in, along with sugar, pumpkin puree, oil, 1 egg, salt and spices. Mix until combined (a few minutes). Add the remaining flour, 1 cup at a time. When you have added it all, the dough should start pulling away from the sides of the bowl and be springy (not sticky). If this is not the case, add more flour in ¼ cup increments until this happens.
Knead the dough either in the bowl with the hook or on a floured surface by hand for around 10 minutes.
Roll the dough into a ball and place in a greased bowl, turning the dough once to grease the top. Cover with a clean towel and leave in a warm spot to rise. Allow to rise until doubled in bulk (around 60-90 minutes).
Depending on how your day is going, poke or punch the dough down and then reshape it into a ball. Grease the bowl again, place the dough ball inside, turn and recover with towel. Let rise for another 60 minutes.
Lightly flour a clean counter or large cutting board and split dough ball in half. Set aside one half. Split the half in front of you into 3 equal sized pieces. Roll each into a long snake, tapering the ends and ensuring they are the same length. The longer you make them, the longer and skinnier your loaf will be (so don’t roll them too thin if you like a fat loaf).
Braid the 3 strands together. (Here is a Youtube video that shows how to braid a 3-strand challah loaf.) Repeat all these steps with the other half of the dough.
Sprinkle cornmeal OR place parchment paper onto a baking sheet (I recommend parchment paper – much easier clean up). Place both braids on top, and allow to rise 40 minutes in a warm place (last time, I promise!).
Pre-heat oven to 350° (make sure you take the dough out if that’s where it is rising). Gently brush egg yolk onto the top of the braids to give them a glossy sheen. Bake for 20 minutes.
To store, wrap bread in plastic wrap and store in a brown paper bag on a dry, cool counter top. You can also freeze the bread by slicing it and then wrapping the slices carefully in plastic and aluminum foil. Reheat in a 350° for 1-2 minutes before serving.
Optional: if you have any left the next morning (don’t be embarrassed if you ate it all), try making French toast:


Russ
February 1, 2010 at 8:57 pm (15 years ago)This tasted amazing!
Stephanie
February 1, 2010 at 9:03 pm (15 years ago)Thanks Russ! I am tempted to defrost the one (out of four loaves) remaining that’s in the freezer…mmm…