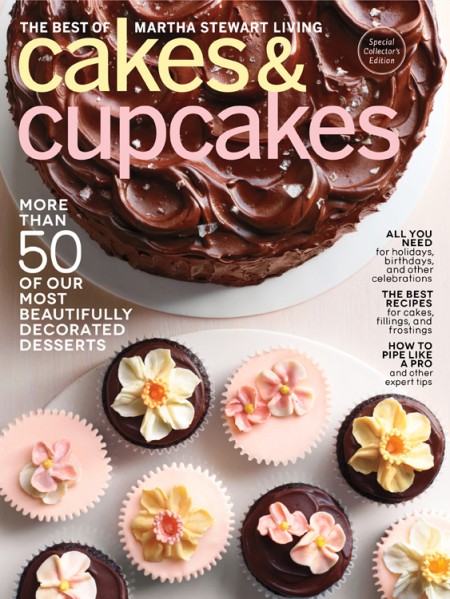
For months, I’ve been wanting to make a ruffle cake. Ever since I made the rose ombre cake, I’ve been meaning to tackle another fun (but easy) cake design. I was finally inspired by Martha Stewart Living’s special collector’s edition issue Cakes & Cupcakes. They sent me a copy to review, which I’m definitely keeping with my cookbooks. This issue is a little thicker and hardier than a typical magazine and should hold up well as a collector’s item.
The magazine chock full of beautiful dessert inspiration. The first section is page after page of gorgeous dessert photos (53 in total). Next is “the basics,” which include the kinds of equipment you’ll need to make the desserts, plus tons of decorating techniques. The last section of the magazine has 53 cake and frosting recipes from the photos at the beginning.
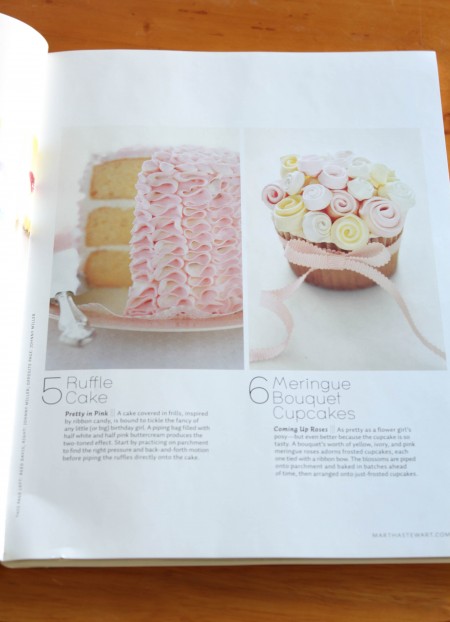
Here’s where I got my inspiration, on page 11, but I didn’t want to make a whole cake and wanted to put my own spin on the idea.
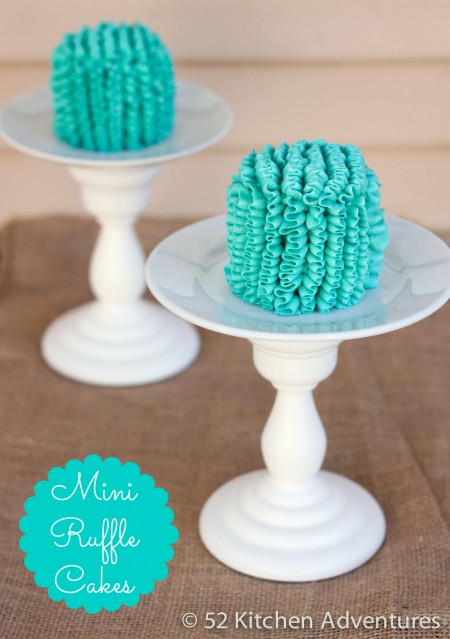
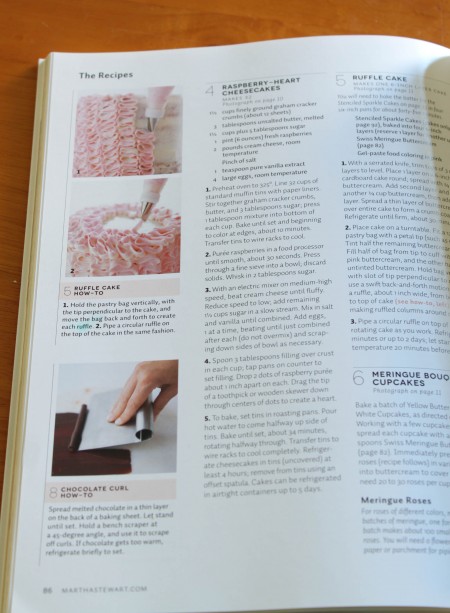
I learned the frosting technique from page 86, and set out to make my own mini version of a ruffle cake. After baking a batch of my very favorite vanilla cupcakes, I made Martha Stewart Living’s go-to frosting, Swiss meringue buttercream. The silky, light texture of this frosting makes it ideal for piping designs like a ruffle. I dyed it with Wilton gel dye in teal and got to decorating.
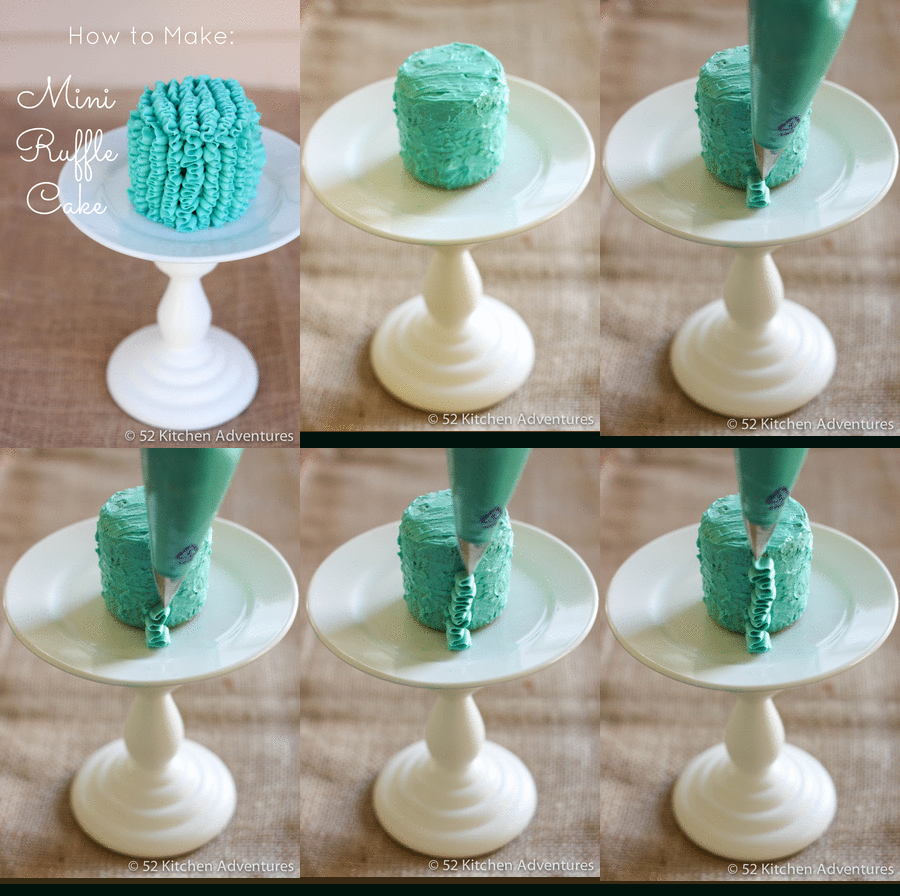
The animated gif below will give you a little of an idea of how to make the mini ruffle cakes. Slice the rounded top off the cupcakes so they’re flat. Pair them up like 2 cake layers and put a thin layer of frosting in between them. After putting a crumb coat (a thin layer of frosting) over the mini cake, fill a piping bag with a petal tip (like the Wilton 103). Hold the bag vertically, with the thin part of the tip facing outward from the cake. Start at the bottom of the cake and move the bag back and forth as you move it from the bottom to the top of the cake. Repeat, making ruffled columns around the cake, and then across the top.
Cakes & Cupcakes is on stands until May 13th, so go get yourself a copy for some baking inspiration!
From Martha Stewart Living
Ingredients
- 1 1/2 cups sugar
- 6 egg whites
- 1 pound (4 sticks) unsalted butter, room temperature
- 1 teaspoon pure vanilla extract
Instructions
- Whisk together sugar and egg whites in a heatproof mixing bowl. Set bowl over a pan of simmering water. Whisk until mixture is warm and sugar is dissolved (around 2-3 minutes), then remove from heat.
- With an electric mixer on medium speed, whisk egg-white mixture 5 minutes. Increase speed to medium-high, and whisk until stiff, glossy peaks form and meringue has cooled (around 6 minutes).
- Reduce speed to medium and add butter a piece at a time, beating well after each addition. Mix in vanilla.
Notes
Store airtight in refrigerator up to 3 days. Bring to room temperature; beat until smooth.
https://www.52kitchenadventures.com/2013/03/10/mini-ruffle-cakes/
Martha Stewart Living provided me with a free copy of the magazine to review, but as always all opinions are my own.
More recipes you’ll love:
14 Comments on Mini Ruffle Cakes
1Pingbacks & Trackbacks on Mini Ruffle Cakes
-
[…] Cakes inspired by 52 Kitchen Adventures […]



Claire
March 10, 2013 at 11:54 pm (12 years ago)Oh mu gosh! That is the coolest gif EVER! I am so going ot make these for my sister-in-law to be’s bridal shower! So cute! How did they taste with that much frosting on them? I am not a huge frosting fan, so that would be my only concern.
Stephanie Nuccitelli
March 11, 2013 at 8:15 am (12 years ago)Thanks Claire! This would be so cute for a bridal shower. It’s definitely a lot of frosting, but I figure people can always leave some on the plate. You could also make a few for display and make more regular cupcakes to serve and display too.
Grace
March 11, 2013 at 12:22 am (12 years ago)wowie wow wow! These are so cute! For some reason though, at first glance I thought these looked a bit like cacti (guess my childhood of living in Arizona has its moments). Either way, I need to make these some time! One question — how do you keep the frosting from melting when frosting the cupcakes? That always seems to be my only problem.
Grace recently posted Spring Asparagus Risotto
Stephanie Nuccitelli
March 11, 2013 at 8:16 am (12 years ago)Thanks Grace! Wait until your cupcakes are completely cooled before frosting. You can also place the cake in the fridge after you do a crumb coat and before frosting. It also helps to be in a cool room (the only time I have issues with melting is in the summer).
Mimi @ Culinary Couture
March 11, 2013 at 7:46 am (12 years ago)These are so cute! I’ve wanted to make a ruffle cake for forever but sort of avoided it because of how much frosting it uses!
Mimi @ Culinary Couture recently posted Spinach Banana Muffins
Annie
March 11, 2013 at 8:09 am (12 years ago)These are so fun and festive! They’ll be fun to try and eat
Laura (Tutti Dolci)
March 11, 2013 at 7:37 pm (12 years ago)How cute, I love the ruffles!
Dani
March 17, 2013 at 11:01 am (12 years ago)Wow!! How did you make the animated gif?!?
Dani recently posted Halfway There!!!
Dani
March 17, 2013 at 11:02 am (12 years ago)ha that seems like the right amount of frosting to me!
kristy @ the wicked noodle
March 18, 2013 at 8:00 am (12 years ago)Your creativity always impresses me, Steph! These are gorgeous and so impressive!
kristy @ the wicked noodle recently posted soy-glazed black cod with smoky grilled pineapple-habanero salsa
Alexandra @ Confessions of a Bright-Eyed Baker
March 18, 2013 at 9:56 pm (12 years ago)I’ve been wanting to try the ruffle cake frosting method myself ever since trying the rose frosting too! I love how gorgeous the piping technique can make a cake and how easy it is. I’ve also been wondering forever what would be the best way to make mini cakes and I love how simple this method is! Does your cupcake tin have straight sides? Mine’s a little slanted like a normal muffin tin so that’s the only thing I’m unsure about. The cakes are adorable!
Alexandra @ Confessions of a Bright-Eyed Baker recently posted DIY Marshmallow Creme
Stephanie Nuccitelli
March 18, 2013 at 10:03 pm (12 years ago)Alexandra, I love these gorgeous, yet easy decorating methods too! I have a regular cupcake tin, but I filled it less than normal and the cupcakes came out about half the size of normal. I didn’t notice them being too slanted when I made them into mini cakes. You could always trim the sides with a knife though if it bothers you.
Christina
January 17, 2014 at 8:22 am (11 years ago)This is such a cute cake and so simple!
Christina recently posted Taking Five: How Breaks Work In My House